Important Note: Please be aware of the following important information.
- You do not pay the transaction fee on Snapdocs RON signings.
- You do not need to upload scanbacks to the signing in Notary Connect. The documents will automatically pass to the order when the RON signing is completed.
Step 1: When you receive a Snapdocs RON notification, the Where information will clearly state "Snapdocs RON." If you are interested in the order, proceed with accepting the order as usual.
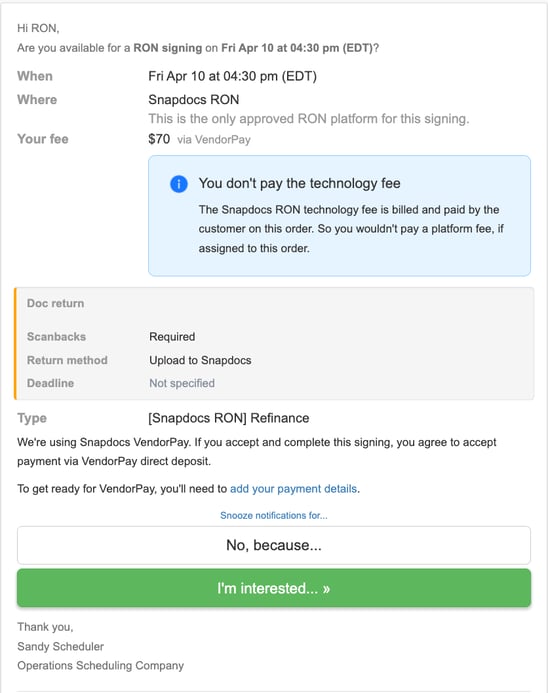
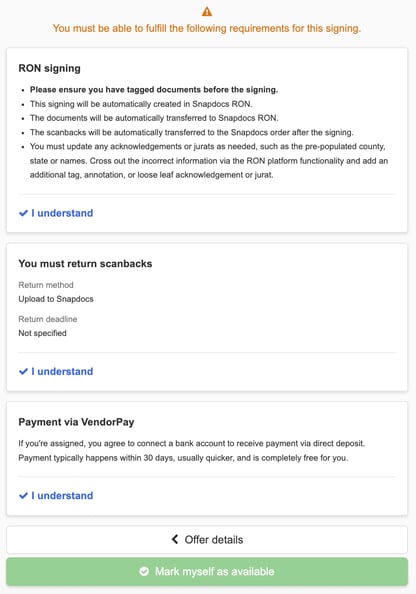
You will have to read accept the order requirements in order to proceed.
Important Note: The request for scanbacks on the order notification is false. You do not need to upload scanbacks to the signing in Notary Connect. The documents will automatically pass to the order when the RON signing is completed.
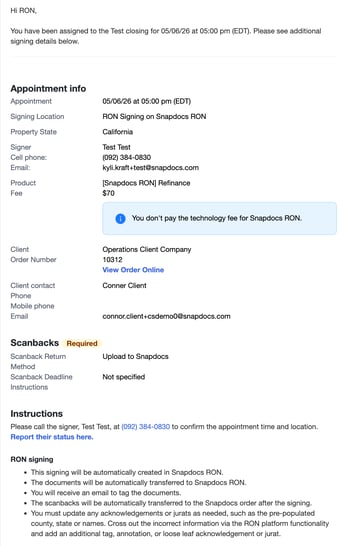
Step 2: If assigned, you will receive a confirmation email with all the details of the signing. We will create the RON signing in Snapdocs RON as soon as you are assigned to the order.
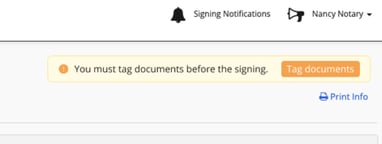
Step 3: As soon as documents are made available, they will pass to the Snapdocs RON signing. You can then tag the documents by clicking the link in the email sent.
For a smooth signing experience, please tag the documents before the signing time.
Note: If documents are not tagged 15 minutes before the scheduling time, the signing will move to “live editing.” You can tag the documents and then immediately begin the signing once the signer(s) have joined.

Alternatively, you can find the button to tag documents in the order.
The link will take you directly to the signing in Snapdocs RON to tag documents. You will be able to add additional signers (witnesses) to the RON signing before you begin tagging.
Step 4: Once you are done tagging the documents, you will move the signing in Snapdocs RON to “scheduled.” This will send an email to the signer to preview documents. They can also complete the KBA and IDV at this time.
At the time of the signing, the link on the order will take you directly to the RON signing.

Step 5: Joining the signing will take you to the details page. From there you will start the session.

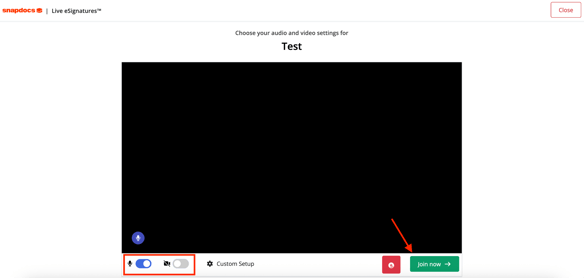
Step 6: You will then see the audio and video settings page. Ensure that your microphone and camera are set as needed. Once ready, select Join now.
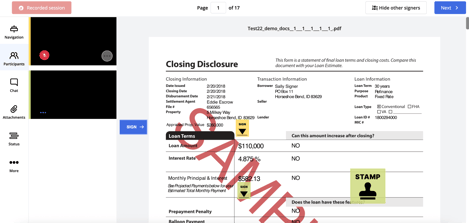
Step 7: You will be brought into the live signing session.
Step 8: Once everything is signed and stamped, you can lock the signing to review and make sure nothing was missed.
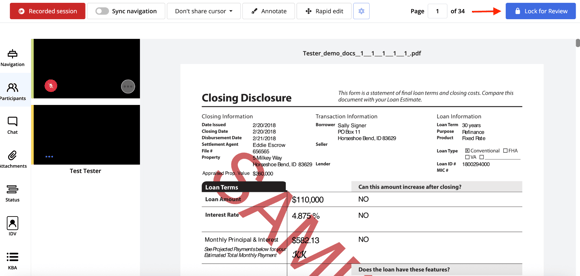
It will ask you to confirm that you are ready to lock for review.
Step 9: Both you and the signer(s) must agree and finalize the package. Select Agree & Finalize.

It will ask you to confirm that you are agreeing to finalize.
Step 10: You will then select End Session. This will take the signer back to the main Snapdocs RON page.
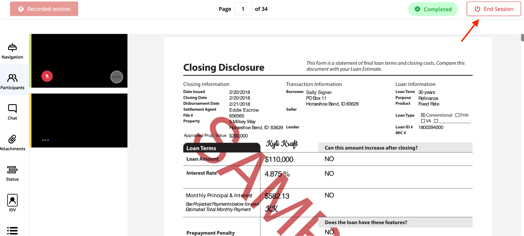
Once the signing is completed, the signed documents will automatically upload to the order in Notary Connect and the signing status will be marked as complete.
If the signing was not completed, you can cancel, reschedule, or click out of the order in Snapdocs RON. You will need to add a ‘Did not sign’ status in Notary Connect. If the signing will be rescheduled, updating the date or time in Notary Connect will re-open the RON order.