Manually Create A Closing In Snapdocs
As a Snapdocs user, you can manually create a closing in Snapdocs by following these steps:
Step 1: Log into Snapdocs.
Step 2: In the upper right corner, select +Add Closing.

Tip: Don’t see the Add Closing button? Your company isn’t using Snapdocs to create closings yet.
Step 3: Add the following information:
- Optional: Enter the file number, Loan ID, Loan Purpose, Loan Type, and Escrow ID.
- Select the settlement office. If the settlement office is not listed yet, simply add it using the settlement office/branch button.
- If you will not be using a settlement office for your closing, you can add an in-office closing branch as the settlement office.
- Select the closing type. If the closing includes an eNote, be sure to select Include eNote.

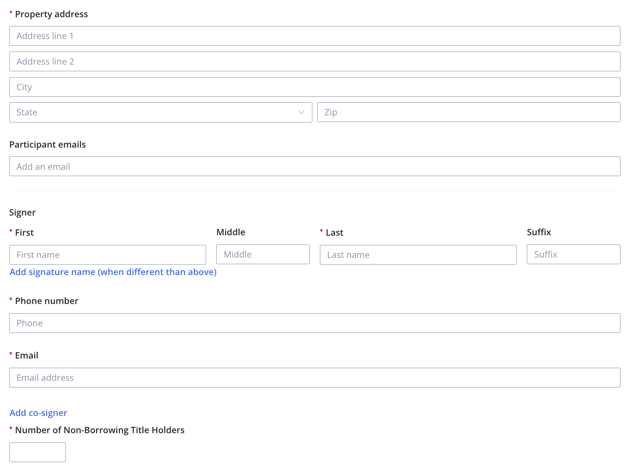
- Enter the address of the property being bought.
- Optional: Enter any participant emails you would like to include from your lending company (i.e. funder, closer, loan officer, loan coordinator, etc.). You will add the settlement agent on the next screen.
- Enter the required borrower/signer information. To add additional signers, select Add Cosigner.
- Enter in the Number of Non-Borrowing Title Holders.

- Optional: Set the closing appointment date range. This will be the range of days that the settlement agent would be able to reschedule the closing appointment if needed.
- Optional: Set the closing appointment date, time, and location. This can also be done by a lender user or settlement agent at a later time, if preferred.
- Select Create closing.

Step 4: Upload the closing package in the documents section of the closing page from your computer.
Once you have created the closing and uploaded the closing documents, Snapdocs will begin document processing and make sure all participants are notified of the closing when necessary.
Step 5: Add a settlement agent using the plus button in the closing team section. If the settlement agent is not listed yet, simply add them by clicking the dropdown menu and selecting Invite settlement agent.
Note: If you are not using a settlement agent, this is where you would add the person in charge of making sure the borrower signs all documents and uploading the wet sign docs back into Snapdocs.

Step 6: If you need to adjust the signer’s contact information, closing type, settlement office, or the closing date & time, click Edit on the top right of a closing to enter the Edit Closing form. Changes to the closing method, borrower name, or borrower email will restart document processing.
