Creating an order with Enhanced Automation
The Automator can begin searching for notaries as soon as an order is created by you, your team, or through title production software.
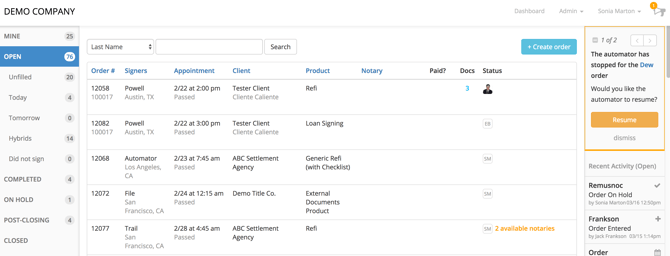
Step 1: The first page you will see when you log into Snapdocs is your dashboard. Here you will see a list of all your orders, filtered by owner, date, and status. You can learn more about how to filter your dashboard here.

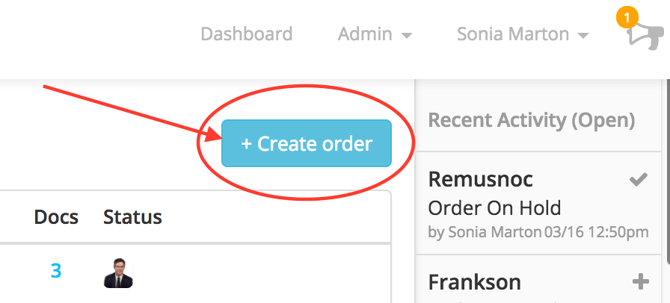
Step 2: You can add a new order on Snapdocs in several different ways. You can select the blue + Create Order button on the right of your screen, push an order over from your preferred title production software or have your client enter an order. Either way, all orders for your company, or your team, will be visible on your dashboard:

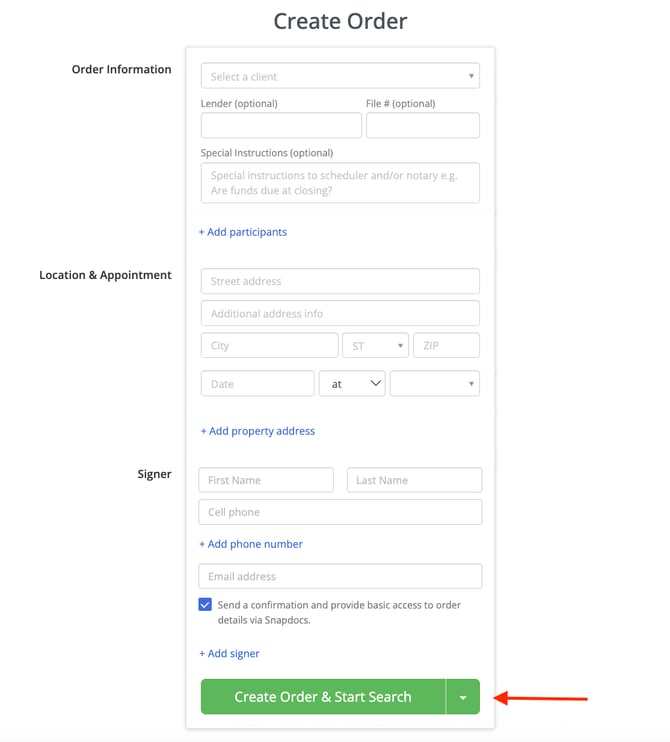
Step 3: If you are entering an order manually, after you click +Create order and enter the signing details, click the green Create Order & Start Search button at the bottom of your screen. Once you click that button, you'll automatically start the process to find a notary!

If you are not ready to start Automating, you can always choose to just create the order without starting the search from this page as well!
 Step 4: The Automator can begin looking for notaries as soon as an order has been created either you, someone on your team, or pushed over from a title production software. (If an order was created by your client, it will show up on your dashboard and you will get an email to alert you to it, but the Automator won't start automatically so that you have a chance to review the order details before you start looking for a notary! As soon as you have confirmed those details, you can start the Automator to kick off the rest of the Automation flow.)
If you chose to just create the order and not start Automating from the Order Create page, however, you can filter the notaries that are included in the Automator on the order page (or for all orders in your Search Preferences):

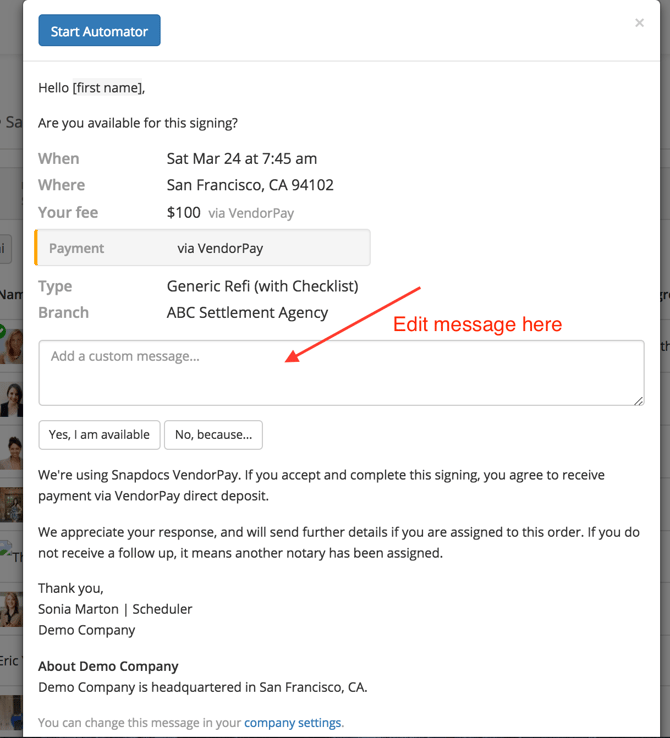
You can adjust the Automator message as well

While you're Automating, texts and emails will be sent out to consecutive notaries every 15 seconds (though you can edit the time between messages in your Search Preferences).
Step 5: As soon as a qualified notary responds as available, they will be assigned to the order! You can decide what "qualified" means to your company in your Automation Settings. If you have any questions about what settings we recommend, don't hesitate to reach out to support@snapdocs.com.
And, if you have chosen to have confirmations sent out automatically, those will also go out when a qualified notary responds as available and is assigned!

You can edit the automated template for client and notary confirmations in your Email Templates.
Note: When Participants are included on the order, a confirmation will go out to them along with the one sent to the client user, and when an email address for the Consumer is included on the order, they will get a confirmation along with the Notary. Any special instructions (per client, product and/or for scanbacks) will also be included on the Notary Confirmation email.
Step 6: In order to send docs to the notary, the docs must be uploaded to your order. You have a number of options for how to upload docs, including dragging and dropping or pushing them over through an integration with your preferred title production software. You can learn more about all the different ways to upload and send docs here.  Once docs have been uploaded, there are a number of different ways to have them sent to the Notary. You can choose for them to be sent automatically, or you can choose an option in the dropdown next to Send Docs to Notary to select how documents should be sent to the notary.

Step 7: Now that you've done all you need to do for this order, you can wait for the signing to take place, for the notary to add a signing status, and for the order to automatically close so that it will be automatically paid out via VendorPay.
If you are interested in any of these features to streamline your experience on Snapdocs, please reach out to support@snapdocs.com so we can get you Automated!