Below is a summary of this functionality – visit the Snapdocs RON help center for more information on Rapid Editing and Live Editing.
Important Note: Once you start the RON session and it is live, updates made in Notary Connect (such as added documents, signer name changes, or signer email changes) will not take effect in Snapdocs RON. Edits and changes must be made manually during the live session.
Rapid Editing
Rapid Editing allows you to add, remove, move, or resize document tags. To activate Rapid Editing mode, simply select Rapid Edit at the top of the page. It will illuminate in blue, as shown below.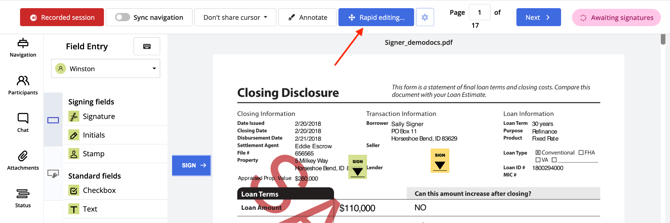
While Rapid Editing is selected, you can move, delete, or resize tags. This can be done to any field, whether they have been filled out already or not.
- Move: simply drag & drop
- Delete: select the tag, then hit the “delete” keyon your keyboard
- Resize: select the edge of the tag
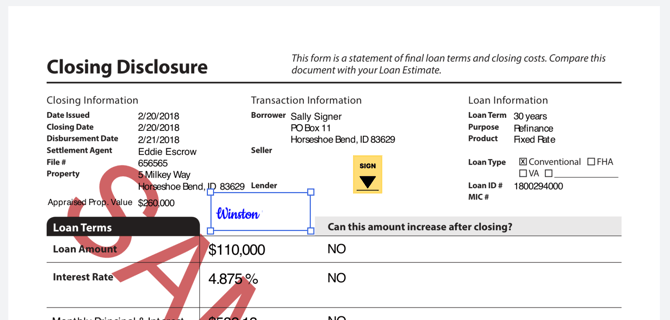
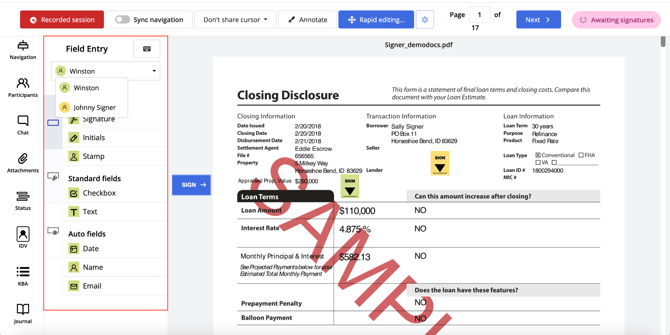
To add tags, the sidebar navigation will allow you to select a signer and add signer-specific tags from the ‘participants’ section.
When you’re done, just select Rapid Editing to exit Rapid Editing mode, which allows you and the signers to continue signing.
Live Editing
Live Editing allows you to make more significant changes during the session, such as changing signer details/emails, adding or removing documents, and managing joint signers.
To access ‘Live Editing’, select the gear icon at the top of the page during the session. Then you will be asked to confirm that you want to continue. The signer(s) will be notified the session is paused while you execute signing updates.
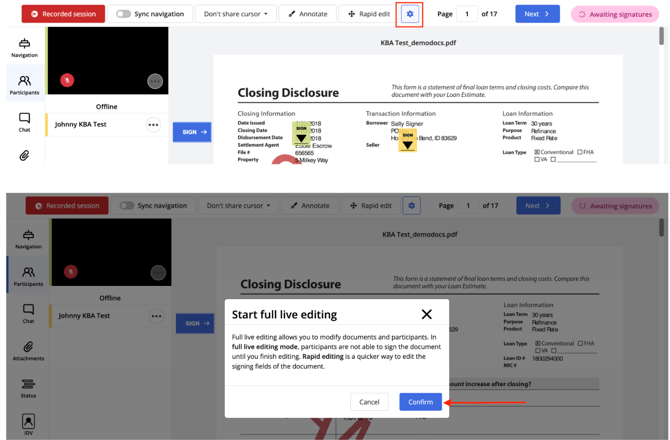
When in Live Editing mode, you can:
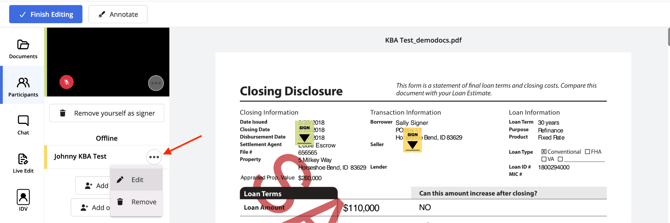
- Update Signers: Adjust signer details or remove signers as needed
- Add a new signer
- Remove a signer
- Update a signer’s name or email (updating the email will trigger a new email to the appropriate email address)
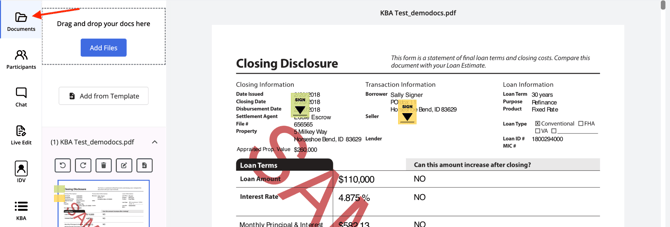
- Update Documents: Handle any last-minute document changes or corrections
- Add new documents
- Remove documents
Update Signers (via ‘Participants’ section)
Select the ellipses next to the signer's name and then select the action you want to take.
Update Documents (via ‘Documents’ section)
Note: The trash can will only appear to deletion of documents once new documents have been uploaded.
Other Editing Options
There are several options available under the ‘More’ section of the side-panel. The key one to familiarize yourself with is ‘Manage Joint Signers’.
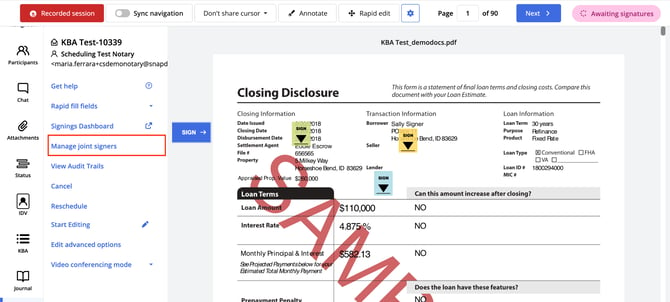
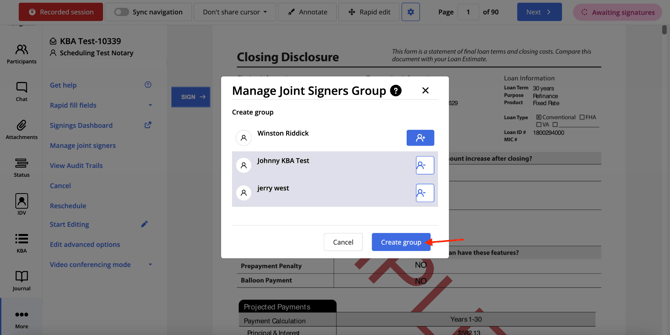
This section allows you to select signer(s) – including witnesses – who will be completing the signing from the same computer. Adding two or more signers/witnesses to the same ‘joint signer group’ ensures that all those signers can complete the session from the same computer, one after another.
To do this, simply select the button next to each signer who will be signing from the same computer, then select Create group.